Screen2ipcam turns a Windows PC screen into a standard ONVIF / RTSP IP camera. A recorder is one way to watch it — but it is not the only one. If you do not own an NVR, you can still watch and even record the stream with software you already have, or with a $40 Raspberry Pi. Here are five ways, from the 30-second one to the always-on one.
Screen2ipcam does not use a private protocol. Once it is running, your PC publishes a normal RTSP video stream and answers ONVIF discovery, exactly like a camera you would buy in a shop. That means anything that can open an IP camera can open your screen — a media player, free recording software, a NAS, a phone app, or a Raspberry Pi.
Your stream address looks like this (the app shows the exact one in the Status tab):
rtsp://192.168.1.64:554/screenlive ← main stream
rtsp://192.168.1.64:554/screensub ← smaller sub stream
Replace 192.168.1.64 with the address shown in the app.
Both devices must be on the same local network.
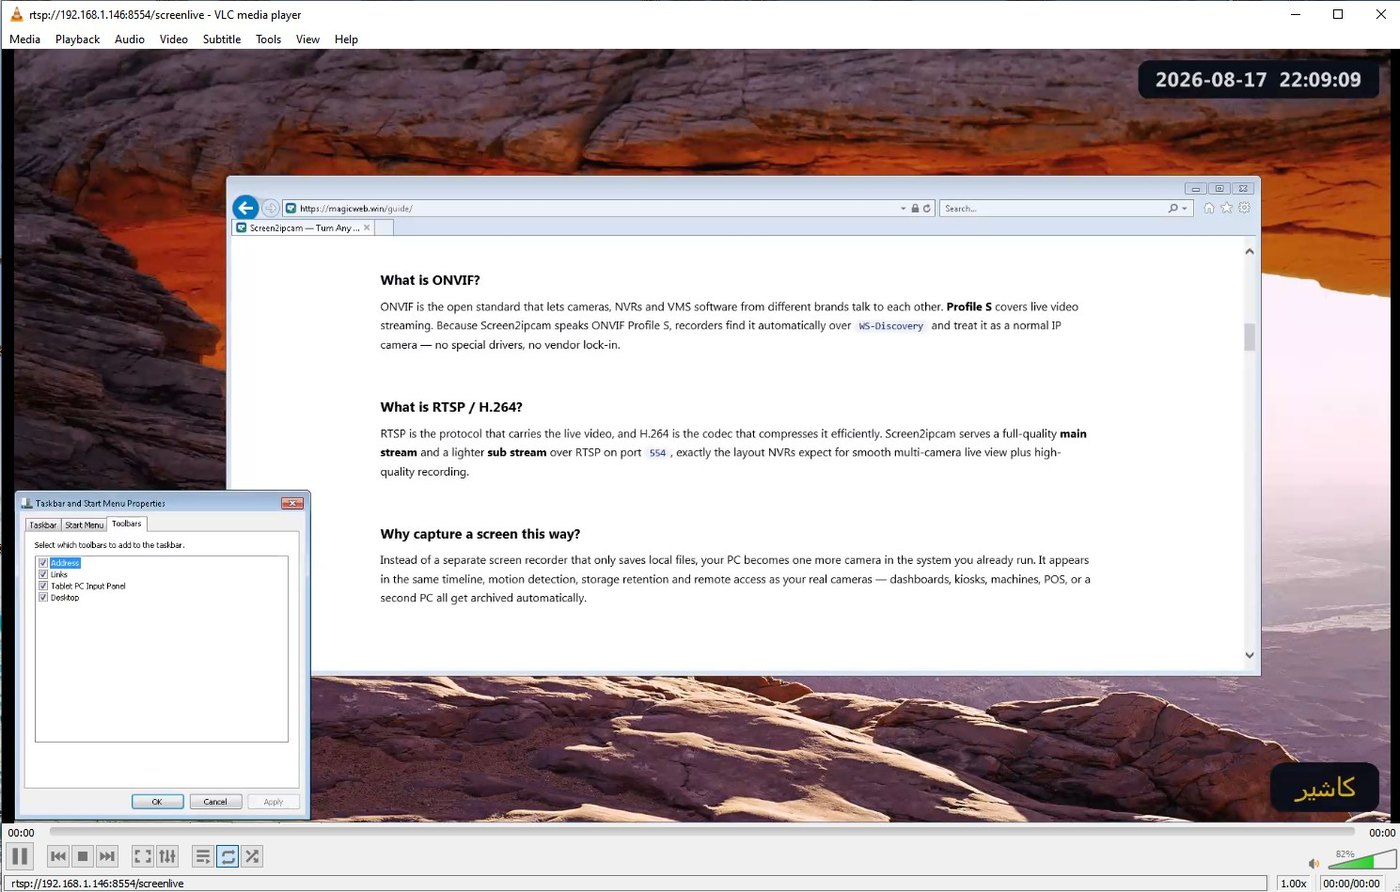
The fastest way to prove the stream works. VLC runs on Windows, macOS and Linux.
rtsp://…/screenlive address and press Play.Good for: checking it works, or watching a screen live from the next room.
Not for: recording — VLC only plays.
A computer you already own becomes the recorder. These accept an ONVIF or RTSP camera and record it to disk:
Good for: a real recording setup at no hardware cost.
Keep in mind: the PC has to stay on while it records.
This is the closest thing to a real NVR without buying one. A Raspberry Pi draws only a few watts, runs silently and can stay on permanently.
Good for: continuous recording on a small budget, in a shop or an office.
Tip: record the sub stream (/screensub) to save a lot of disk space.
If there is a Synology or QNAP box in the office, it is already a recorder.
Good for: businesses that already have a NAS — zero extra hardware, and the recordings live with the rest of the company data.
Any ONVIF or RTSP viewer app can open the stream over Wi-Fi, on Android and iOS alike. Search your app store for an ONVIF viewer or IP camera viewer, add a camera manually, and paste the RTSP address.
Good for: glancing at a shop screen from the same building.
Not for: recording, and it will not work from outside the network without extra setup.
Agent DVR is free, runs on Windows, macOS, Linux and the Raspberry Pi, and records to disk — so it is the closest thing to a real NVR without buying one. Below is the whole process, screen by screen. It takes about two minutes.
Open Agent DVR in your browser. On a fresh install you will see Click to get started. Click the empty area, or press Edit View in the toolbar at the bottom.
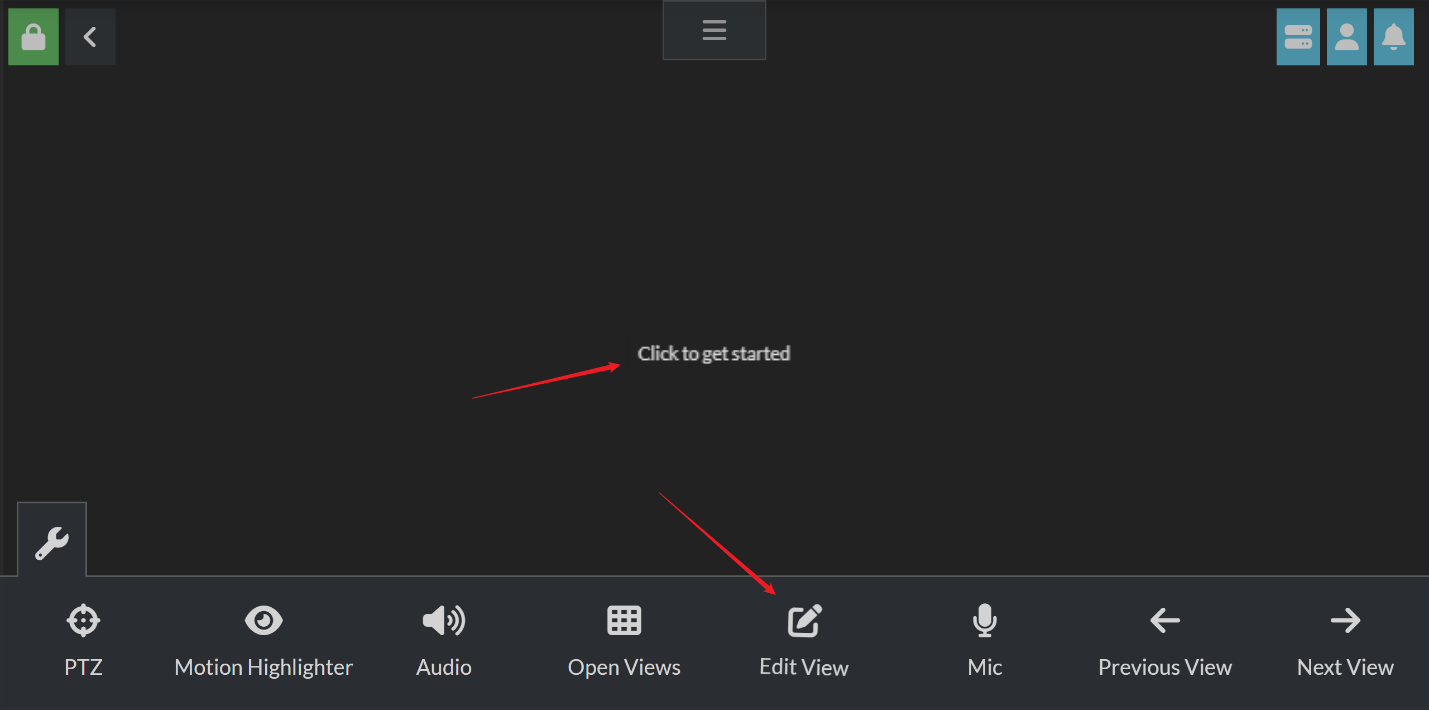
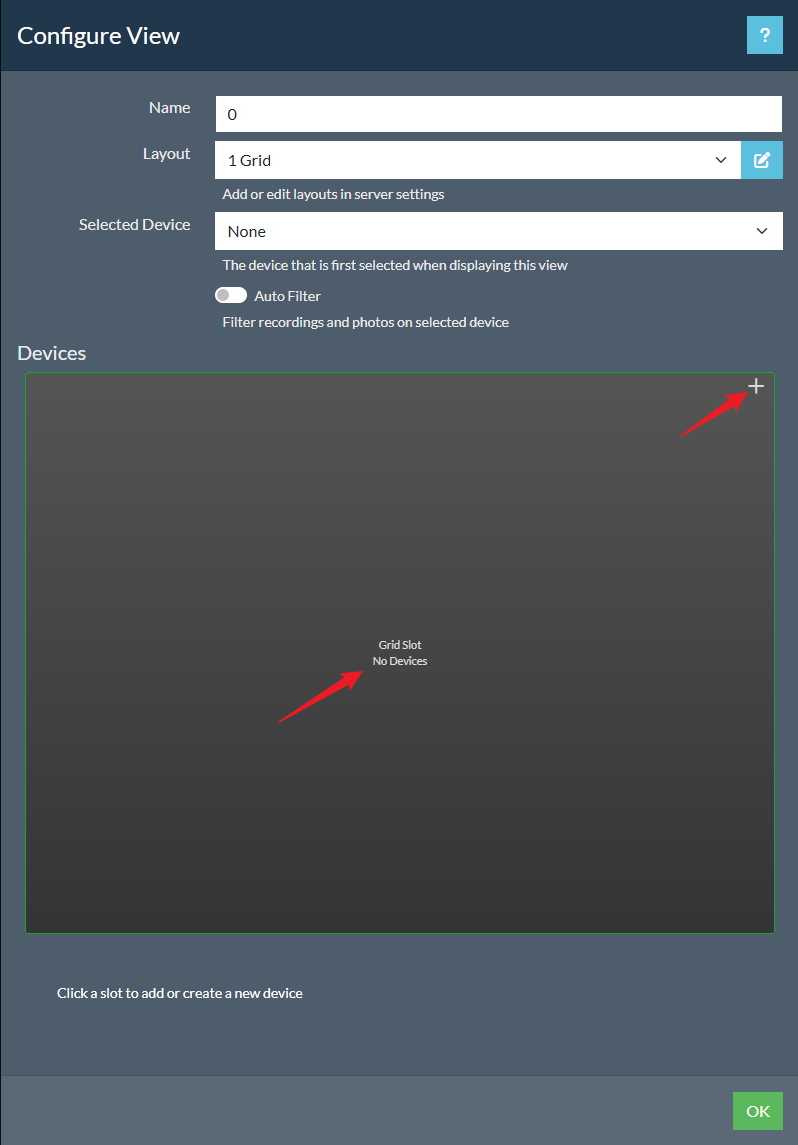
The Configure View panel opens. Click the + in the corner of the grid slot — or click the empty slot itself.
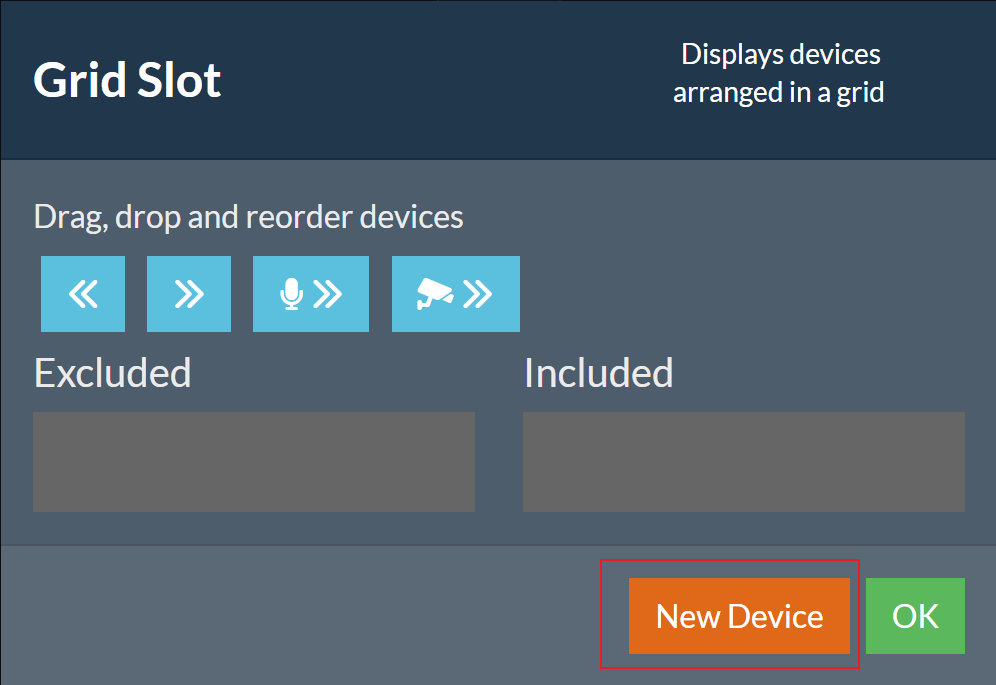
A Grid Slot panel appears with an Excluded / Included list. Press the orange New Device button.
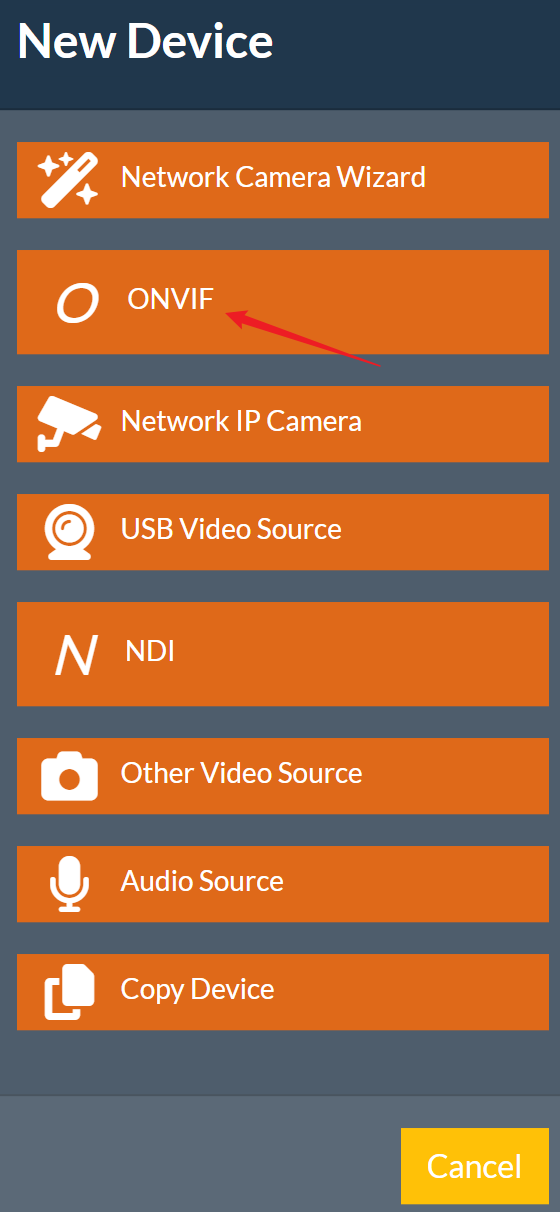
From the device-type list choose ONVIF. This is the important choice: with ONVIF, Agent DVR asks the PC what streams it offers instead of you typing addresses by hand.
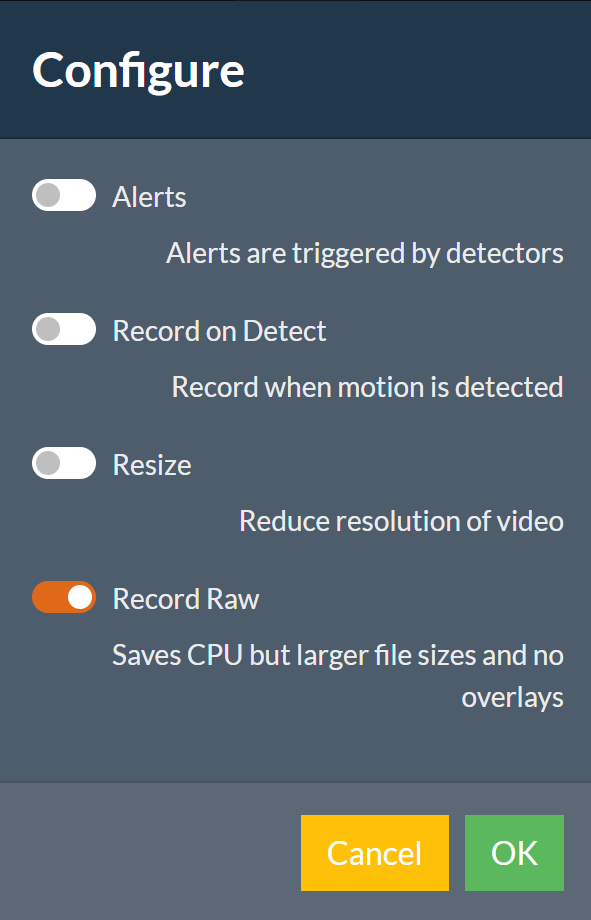
The Configure panel offers Alerts, Record on Detect, Resize and Record Raw. For a PC screen, Record Raw is a good default — it saves CPU because the video is stored exactly as Screen2ipcam sends it. Press OK.
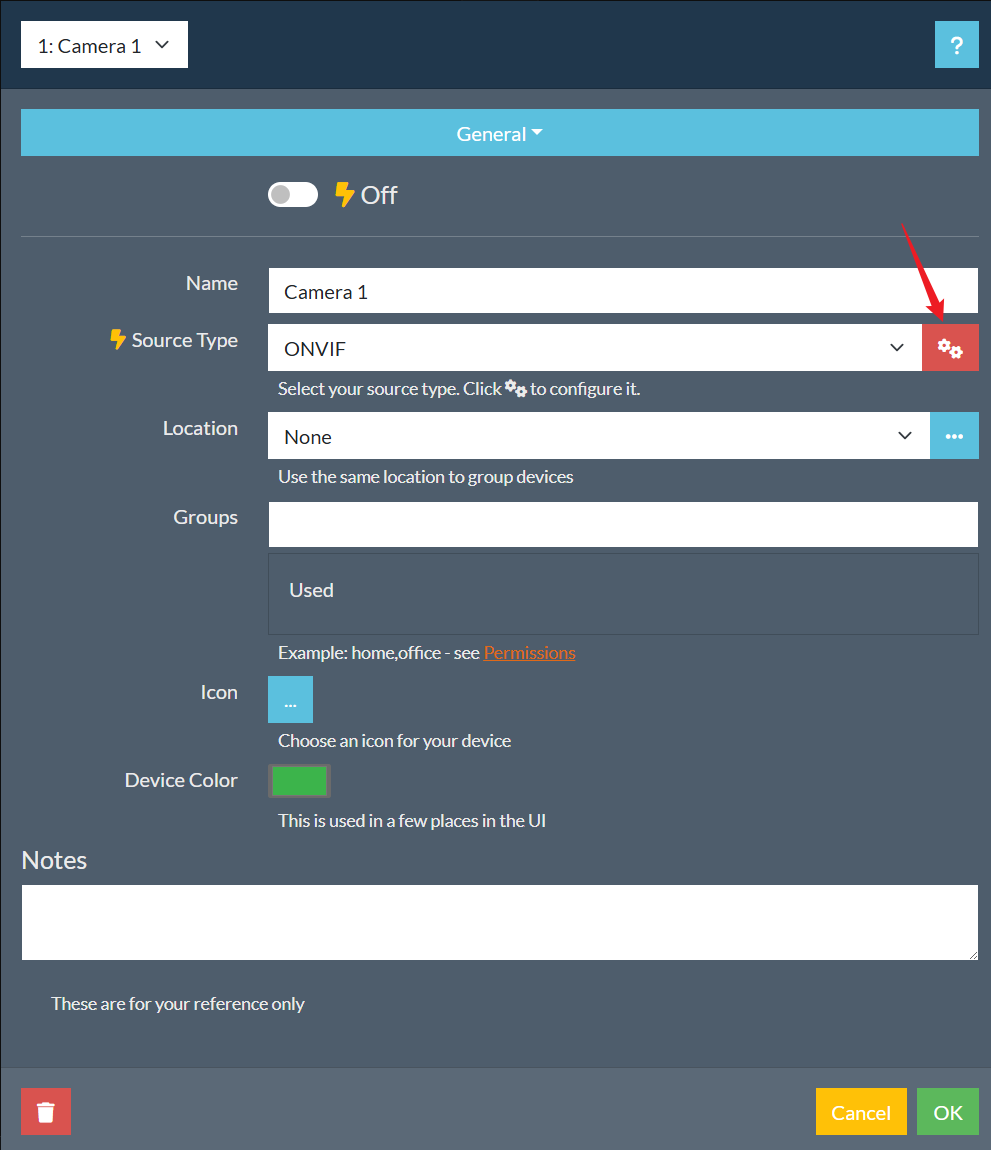
You now see the camera’s General settings with Source Type: ONVIF. Click the small gear button next to it to configure the source.
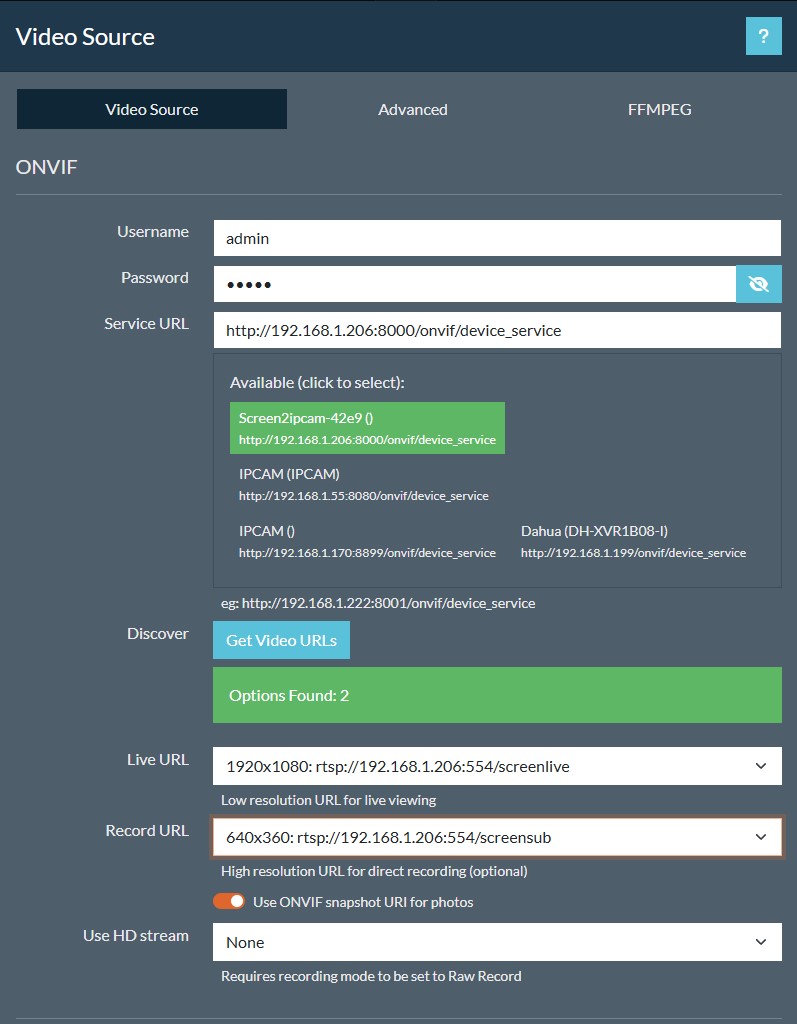
This is the step that does the real work. Agent DVR lists every ONVIF device it can see on the network — and Screen2ipcam appears there by itself, right next to the real cameras. Click it, then press Get Video URLs.
You should see Options Found: 2 and both streams filled in:
Live URL 1920x1080 rtsp://192.168.1.206:554/screenlive
Record URL 640x360 rtsp://192.168.1.206:554/screensub
Watch in full resolution, record the small one — that combination gives a sharp live picture while using a fraction of the disk. If you turned on Secure stream with password inside Screen2ipcam, put the same username and password here; otherwise the two fields can stay empty.
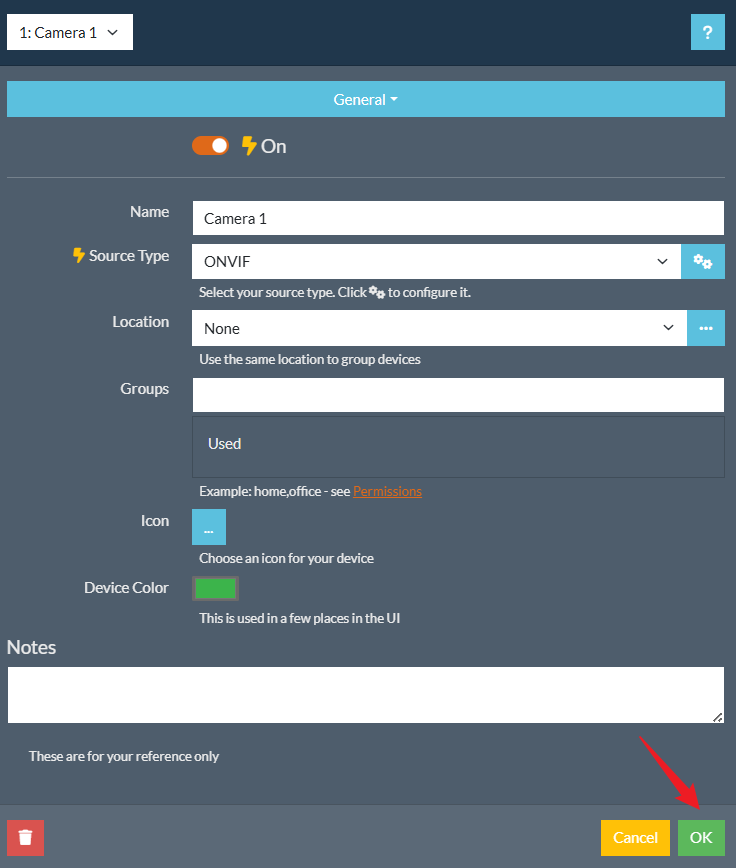
Back on the General tab, flip the toggle at the top to On, give the camera a name you will recognise — Cashier PC, Reception screen — and press OK.
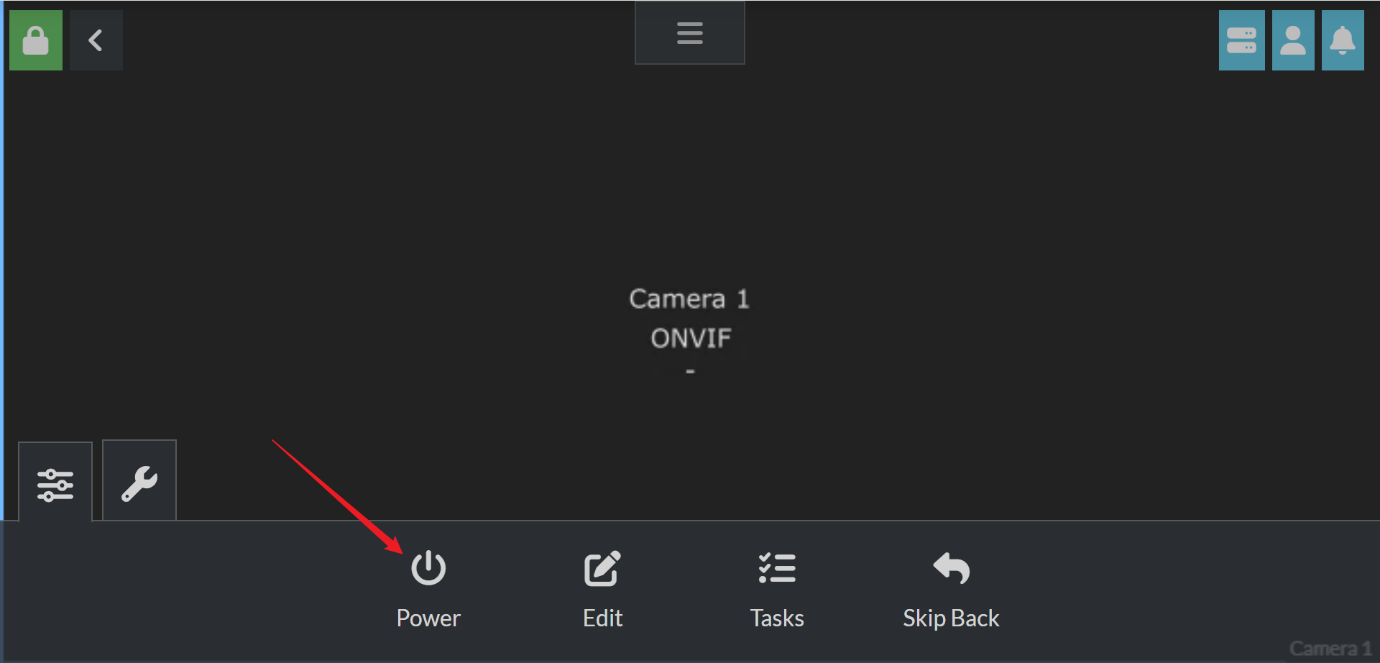
The camera tile appears in the grid. Press Power and the PC screen goes live — and from this moment Agent DVR records it exactly like any other camera.
Run through the nine steps again on the second PC and it lands in the next tile. From here on, both screens live in the same timeline as the rest of your cameras.
http://YOUR-PC-IP:8000/onvif/device_service

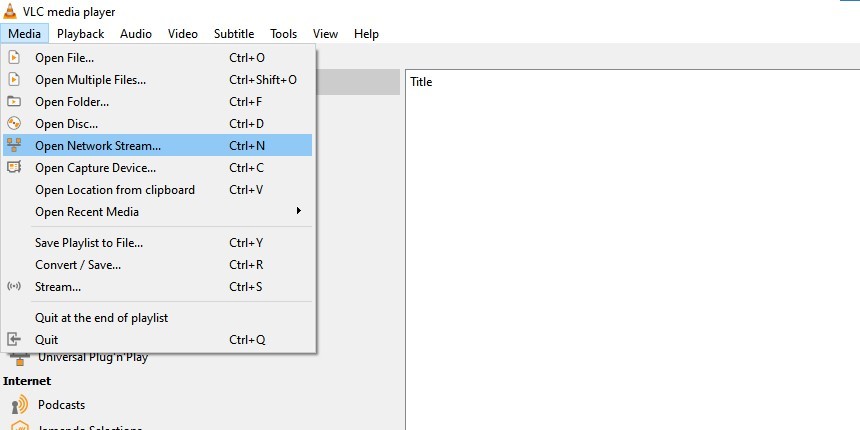
If you only want to see the screen and not record it, VLC is a 30-second check and a good way to prove everything works before setting up a recorder.
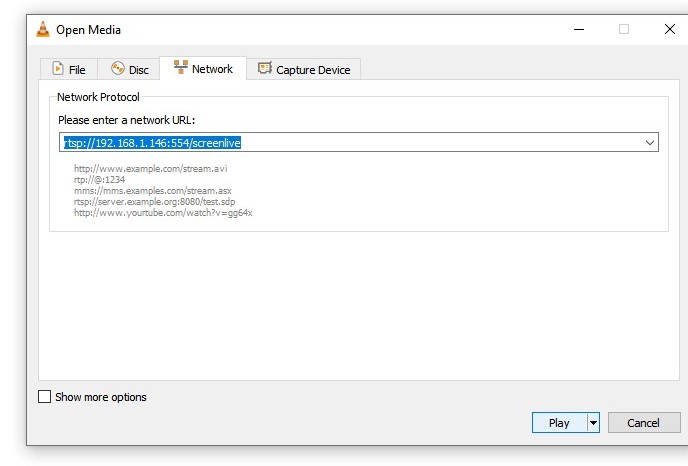
In VLC, choose Media → Open Network Stream — or just press Ctrl + N.
On the Network tab, enter the address of the PC that is running Screen2ipcam and press Play:
rtsp://YOUR-PC-IP:554/screenlive
Use /screenlive for the full-quality main stream, or /screensub for the lighter sub stream. No username or password is needed unless you switched on Secure stream with password inside Screen2ipcam.
That is the whole test. If VLC plays it, any ONVIF or RTSP recorder on the same network will too — the picture you are looking at is exactly the stream an NVR would record.
| Option | Cost | Records? | Can stay on 24/7 | Effort |
|---|---|---|---|---|
| VLC on a PC | Free | No | Only while the PC is on | Very low |
| Free NVR software on a spare PC | Free | Yes | If the PC stays on | Low |
| Raspberry Pi | ≈ $40–$80 once | Yes | Yes | Medium |
| NAS you already own | Already paid | Yes | Yes | Low |
| Phone / tablet app | Free | No | No | Very low |
| A real NVR | Hardware cost | Yes | Yes | Low |
Screen2ipcam behaves the same in every row — it is a standard camera to all of them. The only thing that changes is what you watch it with.
The viewer and the PC running Screen2ipcam need to see each other — same router, same Wi-Fi or same wired network. Watching from another building needs a VPN or a port forward, which is a separate subject and worth doing carefully.
If a firewall is in the way, allow the viewer to reach the PC on 554 (RTSP) and, if you use auto-discovery, 8000 (ONVIF). Port 8080 is only the settings panel — viewers never need it.
Screen2ipcam publishes a smaller second stream. A screen that barely changes costs very little to record, and choosing the sub stream cuts it further — useful on a Raspberry Pi or an older NAS.
Blue Iris
XMEye
Profile S
The trial is the full program for 14 days. Install it, open VLC on any other computer, and see your screen appear. That takes about two minutes and costs nothing — and it tells you far more than any comparison table.
Download the free trial